

Let’s say you are building one app and you want to show the efficient path for collecting garbage from multiple location and then disposing it off at the destination. So in short it’s like waste management app which is being used by worker.
Example of this:
Final code can be viewed in my Github Repository
Ok so right now for this kind of feature we will be making use of Optimization API which is provided by Mapbox and it is really convenient to use it. Documentation is very well documented and flexibility is there in terms of work. Here Optimization API let’s you use 12 location in maps (not more than that) and then it will give you the most efficient path which the driver needs to follow. So you need to just make an API request and make use of the response so that you can show it in Mapbox map. It is quite easy to replicate in simple HTML file but here we will try to do it in Angular 6 so that you can understand how it will work (not much of a change but for example).
Skip this step if you have Angular project already setup. So we will start by creating simple project by doing:
ng new garbage
Great, now after setting up this project, we will create one component:
ng generate component map
Now you have basic project set up. Let’s start by installing dependencies
That’s it, make sure you have these things in package.json and properly installed.
Let’s see how we can make use of mapbox-gl and show one simple map in our component. So we’ll start with editing the map.component.ts:
First make sure you import mapbox-gl in your component by doing:
import * as mapboxgl from 'mapbox-gl';Then import environments so that we can have access-token from there:
import {environment} from '../../environments/environment';Since we are import environment then we need to add access token there. Make sure you get access token from mapbox and then paste it in environment.ts and environment.prod.ts
Example:
export const environment = {
  production: false,
  mapbox: {
    accessToken: '<access-token>'
  }
};
After declaring the access token we need to tell mapbox that which access token we need to use and we generally declare this in our constructor by:
mapboxgl.accessToken = environment.mapbox.accessToken;Now our mapbox is ready to do some work. Our next step is to figure out which map we need to use. With mapbox you have freedom to use any type of map, dark, street, satellite and more and we do this in Mapbox Studio where you can customize your map or restrict your map view to any state or country which is pretty nice thing. Once decided we define our style. So our typescript must look like this (with additional changes):
import { Component, OnInit } from '@angular/core';
import * as mapboxgl from 'mapbox-gl';
import {environment} from '../../environments/environment';

@Component({
  selector: 'app-map',
  templateUrl: './map.component.html',
  styleUrls: ['./map.component.css']
})
export class MapComponent implements OnInit {

  map: mapboxgl.Map;
  style = 'mapbox://styles/shashank-sharma/cjmw1htq80a9w2smqgbyku1r4';
  lat = 28.684444;
  lng = 77.358338;

  constructor() {
    mapboxgl.accessToken = environment.mapbox.accessToken;
  }

  ngOnInit() {
    this.map = new mapboxgl.Map({
      container: 'map',
      style: this.style,
      zoom: 15,
      center: [this.lng, this.lat]
    });
  }
}
Here you can see we have one style defined which I got from Mapbox Studio and here I am using it. Also we have latitude and longitude defined so that we can use it later. Now in ngOnInit we initialized our map where we defined one container as ‘map’ which tells that we need to show our map in id map defined in html. Same style is defined, zoom is set (low - highest, 0-14), and there I defined center of map from where it will start loading. Note that it is not showing your present location right now but showing some random location with center defined.
Now in map.component.html file paste this:
<div id='map' class='contain'></div>Now your map must be visible. To view this map just edit app.component.html and use:
<app-map></app-map>With this you should be able to see your map in root path. Now serve your application and you should be able to see your map as shown in image:
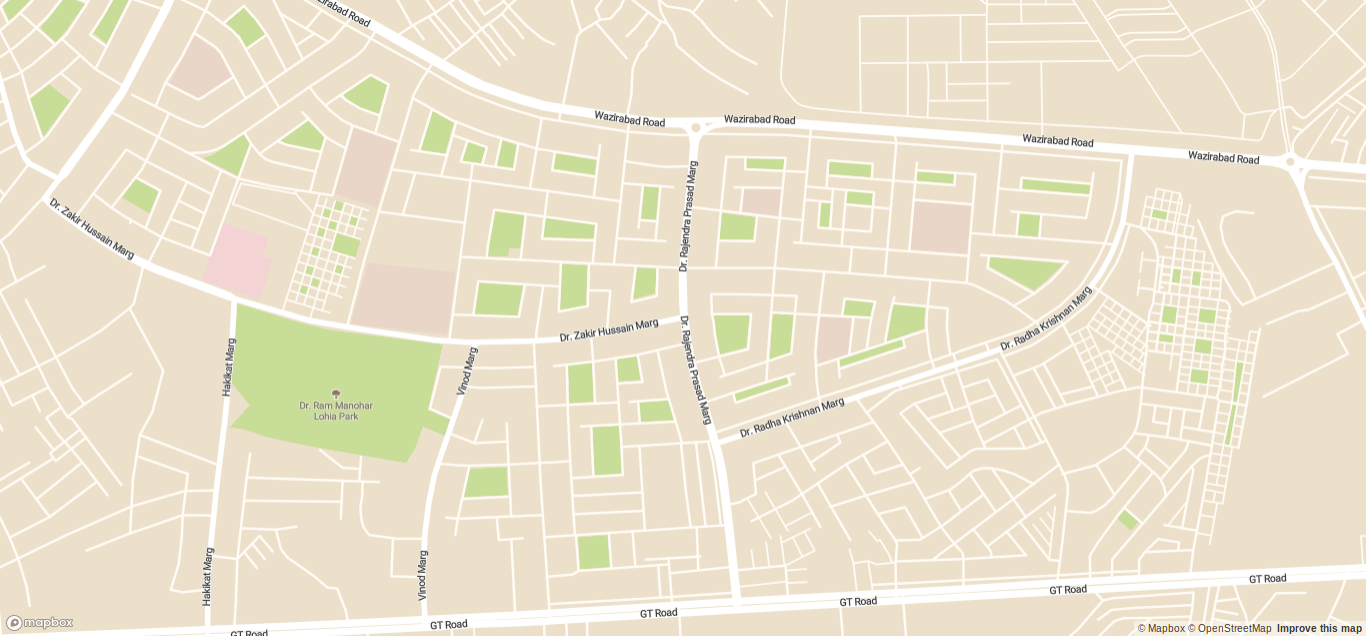
Great, now we can see our map. Now our next step is to define our position and the destination position. Again we need to understand that we are creating optimized path from source location to destination by picking garbage from random locations that’s why source and destination needs to be defined from start.
In mapbox when we customize any map or add anything, for that what we usually do is that we add layers. It means that you add layers on top of map one by one to show them. So now if we need source location (your real location) then first you will get your coordinates and then you will add one layer with customize icon on map with the given lat/lon. To get location we will use navigator.geolocation . Once you get the location you need to move to that location, so we will use ‘flyTo’ function.
So in your map-box.component.ts we will add these things in our ngOnInit function. There will be many things to add so bear with me while reading this:
import { Component, OnInit, ViewEncapsulation } from '@angular/core';
import * as mapboxgl from 'mapbox-gl';
import {environment} from '../../environments/environment';
import * as turf from '@turf/turf';

@Component({
  selector: 'app-map',
  templateUrl: './map.component.html',
  styleUrls: ['./map.component.css'],
  encapsulation: ViewEncapsulation.None
})
export class MapComponent implements OnInit {

  map: mapboxgl.Map;
  style = 'mapbox://styles/shashank-sharma/cjmw1htq80a9w2smqgbyku1r4';
  lat = 28.684444;
  lng = 77.358338;
  warehouseLocation = [77.35172, 28.68234];
  truckLocation = [];

  public warehouse = turf.featureCollection([turf.point(this.warehouseLocation)]);

  constructor() {
    mapboxgl.accessToken = environment.mapbox.accessToken;
  }

  ngOnInit() {

    if (navigator.geolocation) {
      navigator.geolocation.getCurrentPosition(position => {
        this.lat = position.coords.latitude;
        this.lng = position.coords.longitude;
        this.map.flyTo({
          center: [this.lng, this.lat]
        });
        const marker = document.createElement('div');
        marker.classList.add('truck');

        // Create a new marker
        const truckMarker = new mapboxgl.Marker(marker)
          .setLngLat([this.lng, this.lat])
          .addTo(this.map);

        this.truckLocation = [this.lng, this.lat];
      });
    }

    this.map = new mapboxgl.Map({
      container: 'map',
      style: this.style,
      zoom: 15,
      center: [this.lng, this.lat]
    });

    this.map.on('load', () => {
      this.map.addLayer({
        id: 'warehouse',
        type: 'circle',
        source: {
          data: this.warehouse,
          type: 'geojson'
        },
        paint: {
          'circle-radius': 20,
          'circle-color': 'white',
          'circle-stroke-color': '#3887be',
          'circle-stroke-width': 3
        }
      });

      // Create a symbol layer on top of circle layer
      this.map.addLayer({
        id: 'warehouse-symbol',
        type: 'symbol',
        source: {
          data: this.warehouse,
          type: 'geojson'
        },
        layout: {
          'icon-image': 'town-hall-15',
          'icon-size': 1
        },
        paint: {
          'text-color': '#3887be'
        }
      });
    });

  }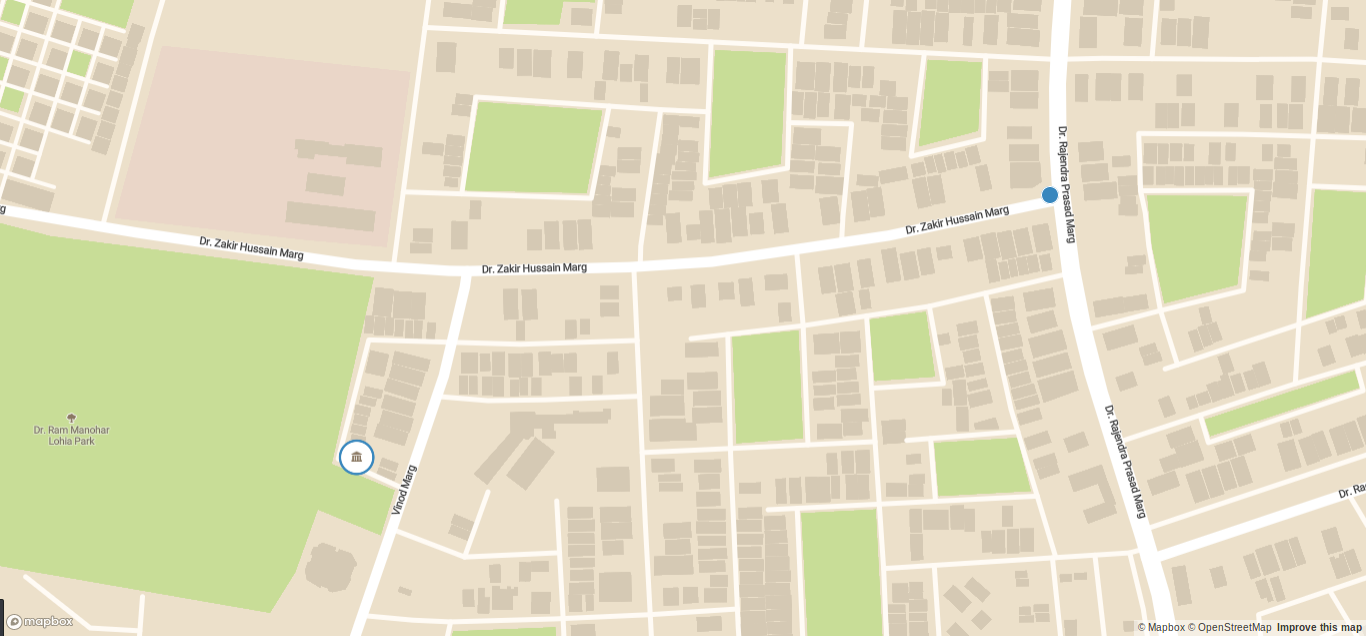
}Once this is done, make sure you save and then serve your project and you should be able to see the map with warehouse and truck location. Make sure you change the warehouse location near your location and you should see something like this:
Now we will make use of Optimization API, but before that we need some random map location from where truck will pick up the garbage. So originally we must use API and get data from server but here we will hard code those locations in our code.
To get random location we will use our function:
getRandomLocation() {
  const randomLocation = [[28.687444, 77.358338], [28.687444, 77.354338], [28.687444, 77.351321], [28.68123, 77.352333]];
  for (let i = 0; i < randomLocation.length; i++) {
    setTimeout(() => {
    this.newDropoff({lng: randomLocation[i][1], lat: randomLocation[i][0]});
    this.updateDropoffs(this.dropoffs);
    }, 2000 + (i * 2000));
  }
}
Now in newDropoff we will define our GeoJSON data in proper format and save it in our variable and also update the map based on that. This will written as:
  newDropoff(coords) {
    // Store the clicked point as a new GeoJSON feature with
    // two properties: `orderTime` and `key`
    const pt = turf.point(
      [coords.lng, coords.lat],
      {
        orderTime: Date.now(),
        key: Math.random()
      }
    );
    this.dropoffs.features.push(pt);
    this.pointHopper[pt.properties.key] = pt;

    const httpOptions = {
    };

    this.http.get(this.assembleQueryURL(), httpOptions).subscribe((data: any) => {
      let routeGeoJSON = turf.featureCollection([turf.feature(data.trips[0].geometry)]);
      if (!data.trips[0]) {
        routeGeoJSON = this.nothing;
      } else {
        // Update the `route` source by getting the route source
        // and setting the data equal to routeGeoJSON
        this.map.getSource('route')
          .setData(routeGeoJSON);
      }

      if (data.waypoints.length === 12) {
        console.log('Maximum number of points reached. Read more at mapbox.com/api-documentation/#optimization.');
      }
    }, (error) => {
      console.log(error);
    });
  }
Now we need to write one assembleQueryUrl which main motive is to make a request to that API url and get the response based on that.
  updateDropoffs(geojson) {
    this.map.getSource('dropoffs-symbol')
      .setData(geojson);
  }

  assembleQueryURL() {

    // Store the location of the truck in a variable called coordinates
    const coordinates = [this.truckLocation];
    const distributions = [];
    this.keepTrack = [this.truckLocation];

    // Create an array of GeoJSON feature collections for each point
    const restJobs = this.objectToArray(this.pointHopper);

    // If there are actually orders from this garbage location
    if (restJobs.length > 0) {

      // Check to see if the request was made after visiting the garbage location
      const needToPickUp = restJobs.filter((d, i) => {
        return d.properties.orderTime > this.lastAtGarbage;
      }).length > 0;

      // If the request was made after picking up from the garbage location,
      // Add the garbage location as an additional stop
      if (needToPickUp) {
        this.garbageIndex = coordinates.length;
        // Add the garbage location as a coordinate
        // coordinates.push(this.warehouseLocation);
        // push the garbage location itself into the array
        this.keepTrack.push(this.pointHopper.warehouse);
      }

      restJobs.forEach((d, i) => {
        // Add dropoff to list
        this.keepTrack.push(d);
        coordinates.push(d.geometry.coordinates);
        // if order not yet picked up, add a reroute
        if (needToPickUp && d.properties.orderTime > this.lastAtGarbage) {
          distributions.push(this.garbageIndex + ',' + (coordinates.length - 1));
        }
      });
    }


    // Set the profile to `driving`
    // Coordinates will include the current location of the truck,
    return 'https://api.mapbox.com/optimized-trips/v1/mapbox/driving/' +
    coordinates.join(';') + ';' +
    this.warehouseLocation[0] + ',' +
    this.warehouseLocation[1] +
    '?overview=full&steps=true&annotations=duration,distance,speed&geometries=geojson&source=first&destination=last&roundtrip=false&access_token=' +
    mapboxgl.accessToken;
  }
Now at last we need to add the layer to show the path on the path, so we will add our custom layer named as ‘road-label’, also make sure that this ‘road-label’ layer is preset in our mapbox styling (when we edit in mapbox studio) so that it can show those path in maps. So to summarize our map.component.ts should look like:
import { Component, OnInit, ViewEncapsulation, AfterViewInit } from '@angular/core';
import * as mapboxgl from 'mapbox-gl';
import {environment} from '../../environments/environment';
import * as turf from '@turf/turf';
import {HttpClient, HttpHeaders} from '@angular/common/http';
import {getRandomString} from 'selenium-webdriver/safari';

@Component({
  selector: 'app-map',
  templateUrl: './map.component.html',
  styleUrls: ['./map.component.css'],
  encapsulation: ViewEncapsulation.None
})
export class MapComponent implements AfterViewInit {

  map: mapboxgl.Map;
  style = 'mapbox://styles/shashank-sharma/cjmw1htq80a9w2smqgbyku1r4';
  lat = 28.684444;
  lng = 77.358338;
  warehouseLocation = [77.35172, 28.68234];
  truckLocation = [];


  public pointHopper: any = {};
  public keepTrack = [];
  public garbageIndex: any;
  public lastAtGarbage = 0;

  public warehouse = turf.featureCollection([turf.point(this.warehouseLocation)]);
  public dropoffs = turf.featureCollection([]);
  public nothing = turf.featureCollection([]);

  constructor(private http: HttpClient) {
    mapboxgl.accessToken = environment.mapbox.accessToken;
  }

  ngAfterViewInit() {

    if (navigator.geolocation) {
      navigator.geolocation.getCurrentPosition(position => {
        // Comment these out if you want to replicate the blog map view
        this.lat = position.coords.latitude;
        this.lng = position.coords.longitude;
        // Till here
        this.map.flyTo({
          center: [this.lng, this.lat]
        });
        this.getRandomLocation();
        const marker = document.createElement('div');
        marker.classList.add('truck');

        // Create a new marker
        const truckMarker = new mapboxgl.Marker(marker)
          .setLngLat([this.lng, this.lat])
          .addTo(this.map);

        this.truckLocation = [this.lng, this.lat];
      });
    }

    this.map = new mapboxgl.Map({
      container: 'map',
      style: this.style,
      zoom: 15,
      center: [this.lng, this.lat]
    });

    this.map.on('load', () => {

      this.map.on('click', (e) => {
        // When the map is clicked, add a new drop-off point
        // and update the `dropoffs-symbol` layer
        this.newDropoff(this.map.unproject(e.point));
        this.updateDropoffs(this.dropoffs);
      });

      this.map.addSource('route', {
        type: 'geojson',
        data: this.nothing
      });

      this.map.addLayer({
        id: 'routeline-active',
        type: 'line',
        source: 'route',
        layout: {
          'line-join': 'round',
          'line-cap': 'round'
        },
        paint: {
          'line-color': '#3887be',
          'line-width': {
            base: 1,
            stops: [[12, 3], [22, 12]]
          }
        }
      }, 'road-label');

      this.map.addLayer({
        id: 'dropoffs-symbol',
        type: 'symbol',
        source: {
          data: this.dropoffs,
          type: 'geojson'
        },
        layout: {
          'icon-allow-overlap': true,
          'icon-ignore-placement': true,
          'icon-image': 'marker-15',
        }
      });


      this.map.addLayer({
        id: 'warehouse',
        type: 'circle',
        source: {
          data: this.warehouse,
          type: 'geojson'
        },
        paint: {
          'circle-radius': 20,
          'circle-color': 'white',
          'circle-stroke-color': '#3887be',
          'circle-stroke-width': 3
        }
      });

      this.map.addLayer({
        id: 'warehouse-symbol',
        type: 'symbol',
        source: {
          data: this.warehouse,
          type: 'geojson'
        },
        layout: {
          'icon-image': 'town-hall-15',
          'icon-size': 1
        },
        paint: {
          'text-color': '#3887be'
        }
      });

      this.map.addLayer({
        id: 'routearrows',
        type: 'symbol',
        source: 'route',
        layout: {
          'symbol-placement': 'line',
          'text-field': '▶',
          'text-size': {
            base: 1,
            stops: [[12, 24], [22, 60]]
          },
          'symbol-spacing': {
            base: 1,
            stops: [[12, 30], [22, 160]]
          },
          'text-keep-upright': false
        },
        paint: {
          'text-color': '#3887be',
          'text-halo-color': 'hsl(55, 11%, 96%)',
          'text-halo-width': 3
        }
      }, 'road-label');

    });

  }

  newDropoff(coords) {
    // Store the clicked point as a new GeoJSON feature with
    // two properties: `orderTime` and `key`
    const pt = turf.point(
      [coords.lng, coords.lat],
      {
        orderTime: Date.now(),
        key: Math.random()
      }
    );
    this.dropoffs.features.push(pt);
    this.pointHopper[pt.properties.key] = pt;

    const httpOptions = {
    };

    this.http.get(this.assembleQueryURL(), httpOptions).subscribe((data: any) => {
      let routeGeoJSON = turf.featureCollection([turf.feature(data.trips[0].geometry)]);
      if (!data.trips[0]) {
        routeGeoJSON = this.nothing;
      } else {
        // Update the `route` source by getting the route source
        // and setting the data equal to routeGeoJSON
        this.map.getSource('route')
          .setData(routeGeoJSON);
      }

      if (data.waypoints.length === 12) {
        console.log('Maximum number of points reached. Read more at mapbox.com/api-documentation/#optimization.');
      }
    }, (error) => {
      console.log(error);
    });
  }

  updateDropoffs(geojson) {
    this.map.getSource('dropoffs-symbol')
      .setData(geojson);
  }

  assembleQueryURL() {

    // Store the location of the truck in a variable called coordinates
    const coordinates = [this.truckLocation];
    const distributions = [];
    this.keepTrack = [this.truckLocation];

    // Create an array of GeoJSON feature collections for each point
    const restJobs = this.objectToArray(this.pointHopper);

    // If there are actually orders from this garbage location
    if (restJobs.length > 0) {

      // Check to see if the request was made after visiting the garbage location
      const needToPickUp = restJobs.filter((d, i) => {
        return d.properties.orderTime > this.lastAtGarbage;
      }).length > 0;

      // If the request was made after picking up from the garbage location,
      // Add the garbage location as an additional stop
      if (needToPickUp) {
        this.garbageIndex = coordinates.length;
        // Add the garbage location as a coordinate
        // coordinates.push(this.warehouseLocation);
        // push the garbage location itself into the array
        this.keepTrack.push(this.pointHopper.warehouse);
      }

      restJobs.forEach((d, i) => {
        // Add dropoff to list
        this.keepTrack.push(d);
        coordinates.push(d.geometry.coordinates);
        // if order not yet picked up, add a reroute
        if (needToPickUp && d.properties.orderTime > this.lastAtGarbage) {
          distributions.push(this.garbageIndex + ',' + (coordinates.length - 1));
        }
      });
    }


    // Set the profile to `driving`
    // Coordinates will include the current location of the truck,
    return 'https://api.mapbox.com/optimized-trips/v1/mapbox/driving/' +
    coordinates.join(';') + ';' +
    this.warehouseLocation[0] + ',' +
    this.warehouseLocation[1] +
    '?overview=full&steps=true&annotations=duration,distance,speed&geometries=geojson&source=first&destination=last&roundtrip=false&access_token=' +
    mapboxgl.accessToken;
  }

  objectToArray(obj) {
    const keys = Object.keys(obj);
    const routeGeoJSON = keys.map(function(key) {
      return obj[key];
    });
    return routeGeoJSON;
  }

  getRandomLocation() {
    const randomLocation = [[28.687444, 77.358338], [28.687444, 77.354338], [28.687444, 77.351321], [28.68123, 77.352333]];
    for (let i = 0; i < randomLocation.length; i++) {
      setTimeout(() => {
      this.newDropoff({lng: randomLocation[i][1], lat: randomLocation[i][0]});
      this.updateDropoffs(this.dropoffs);
      }, 2000 + (i * 2000));
    }
  }
}
Once you save this and serve your application you should be able to see your updates on map. Now in production level you can get random location through REST API and then show it. With mapbox feature you can even add navigation button navigate the driver based on route. Final view:
And now you got this working. Now this is very simple view showing these optimized route but with your skills you can highly customize it to show many things at the same time like distance, time and many more things which I have no discussed here. Obviously the official documentation is much more descriptive and here I simply showed the easy way of how we can get it working.